Monday, December 21, 2009

Website redesign using templates


For the last few years, I have used a flash-based web template. It has served me well, and I received many positive compliments on it from my clients. It had some limitations, including one short sound clip which got pretty boring, and no automatic slide show capability.

I wanted to take it a step further, to update the look and give the viewer a richer experience. I am very comfortable with the template approach, so I returned to Winklet Web Design to check out their offerings. I evaluated their photography portfolio templates #29, 30 and 31, and ultimately chose the latter, #31.

This template features a cycle of images on the home page, as well as a number of portfolios which also have slide shows that cycle through the images. I can upload my own music, and link to my blog.

I took the opportunity to refresh all of the images and define clean categories for my main offerings: Weddings, Seniors and Family Portraits. I included a fourth "Other" category for specialty images.

I have also been doing some electronic music, so the song I uploaded was a composition I recorded last winter.

In all, it took me about 10 hours from start to upload. That included the time to edit and order the 100+ images and thumbnails on the site, as well as updating my keywords and other tracking identifiers such as Google Analytics. Ongoing updates, such as price lists and fresh images, only take a few minutes to update.

So, if you are contemplating creating or updating a website, consider giving web templates a try. It's a great way to establish a classy image without getting very technical or spending a fortune.

Wednesday, December 2, 2009

Wedding Photography: Developing Packages


The last couple of years I have struggled with my marketing plan for Weddings. I have spent a lot of time and effort on my Seniors plan and it has worked out very well. I routinely exceed my goals for sessions and revenue for that area, and I seem to have the right range of product offerings for my customers' needs.

My original wedding offering was simple: A fixed price for the shoot, which included credits for the purchase of products. But I found two problems: Indecision, and lack of a data disc offering.

I found that when I did offer a fixed price for the wedding, the bride and groom would struggle to decide what they wanted. Without guidelines or a framework, it was hard for them to determine what they wanted.

And I was getting a lot of calls asking for the image files as part or all of the package. A couple of years ago, I told them that I did not sell my images. I lost a lot of inquiries for that reason. The sad thing is, I believe that they booked someone less capable than me.

I thought about it and decided that I was in the business of providing wedding memories, not prints. If my customers wanted a disc, I can deliver that to them in the same fashion as prints. As long as I cover my time and make my sales and profitability goals, I couldn't rationalize why I shouldn't offer the data files.

So I took a clue from my Senior offerings and created several packages. The original is still there - they pay me for the day and have a design credit to spend a la carte. I also have a "digital only" package, which lands them a disc and a small print credit. But I also have a few larger packages that combine many of my offerings into a greater value.

And I continue to consult with my customers that my recommendation is that they use me for their prints - mainly because I can produce a print quality that they cannot approach from drug store print kiosks, and I feature my slideshow and book designs during the review. But I offer them various options for getting the data disc alone or in concert with a prints and products package.

The reception has been good. Even though I have only had the new prices up for a few weeks, I have had more productive discussions with current and prospective wedding couples. It gives them something to get their heads around in terms of a whole offering.

I keep all my pricing on my website. I know it encourages window shopping, but I still get a lot of inquiries. And most of those who call me or email me have done their homework. They like my work, are comfortable with my pricing, and are often ready to book. It keeps everyone's time efficient and shows my customers that I'm not afraid to disclose my pricing to my competitors.

One other thing I discovered is that you really need to price a year ahead with weddings. Many of my customers are booking me for 2010, and I freeze their pricing on the day they sign a contract with me. Given that I have sold more than half of my 2010 wedding capacity, I don't have that many opportunities for new customers to work with my new pricing next year.

That means that I am learning to create the long view for weddings - it's a very different business cycle from Seniors and other types of sales.


So, if you are struggling with wedding pricing, consider structuring several packages to give your clients some choices and reference points. You may just win more bookings and keep your customers happier!

Monday, November 30, 2009

Another Lens in the Bag!

I just added the Canon 10-22mm lens to my bag. It's a bit pricey, but I think I can do some really interesting shots with it.

One advantage of this ultra-wide lens is the distortion of perspective you get from close objects. For example, here are a couple of shots of my dog and some flowers to illustrate the effect.


I also shoot some pretty close stuff in dance studios, and this will let me do some interesting things there as well. And I can't wait to shoot some great landscapes!


Thursday, November 12, 2009

The Internet Ruined Everything

Newsweek recently published an online article by Daniel Lyons entitled How The Internet Ruined Everything. He describes how the emergence of new technology, namely the internet and the capabilities it provides, caused older, established businesses to weaken and fail.

He cites as examples Newspapers, TV, the music industry, movies and more. It's interesting reading, as it describes industry after industry failing to see the change coming and anticipating how it will impact them.

The internet is not the first technology to upset established industries. Many major technological changes caused industries to weaken or become irrelevant. The rise of the automobile punished the horse and buggy industries. Telephone impacted telegraph. Television impacted the radio industry. VCR's, Cassettes, CD's, Digital Cameras, you name it.

This is the reality: New inventions or technologies will destroy old business models. You can't change that. You can learn how to profit from it, though.

If you are a film photographer, digital probably messed with you. Faced with a choice, you could either adapt to the new tech, lose business to those that did, or stay old school and become a niche business. Either way, you had to make a choice.

Film or not, now we have the world of $700 dSLRs and $200 printers. Now anyone with $1000 can shoot and print. Maybe not at your quality level, but some customers won't know the difference. It may bug you that someone else can elbow their way into your niche with little investment or experience, but getting angry about it won't make it stop.

And the internet has made advertising and promotion inexpensive and quick. What used to involve yellow pages and print advertising can now be done through social networking, blogging and e-newsletters. If you are not leveraging these technologies, you are losing edge and exposure. Young people just don't look in the phone book. Their phone book is that little search box in the browser...or on their cell phone's browser. If you aren't served up in those search results, you are invisible to them.

Proofing used to involve contact sheets and books. Now it's online or done through projection. If you can't provide online or individualized proofing, other than printed 4x5's, you are losing edge and customers.

How many of your consults ask for a DVD of images? Last year I said a flat "no", then realized that they are going somewhere. I now get twice as many wins as last year, and I have two kinds of wedding clients - those who want a DVD and pay me more up front, and those who want prints and books and pay me later. My DVD clients require less total effort, so I can fit in more and generate volume through higher session counts. I still do a lot of print business.

So...call them resets, paradigm shifts or technological revolutions. They will continue to happen.

Each of the industries impacted by old technology had a choice: adapt or die. In Adapting, they had to broaden the focus of their mission.

Think of how today's shifts are changing our world. Are we makers of paper prints, or a creator of visual memories? How does the broadened scope allow us to break out of a shoot-proof-print mode and get into the consult-create-share/sell mode? Deliver images for someone's PDA, cell phone or Kindle? Mix video clips and stills for our clients? Become a teacher for digital photography so they can do what you do...but call you for the big stuff? Offer digital image archival and transfer for clients?

You have to define how far you can stretch and stay in your comfort zone. But remember, where you do not choose to go, new entrants to your space will be there, and so will some of your customers. I'm not saying you lower your standards for quality, profit or style. But you may need to expand your offerings and look outside your old business model to find growth or sustainability to yesterday's expectations.

What's out there on the horizon that might change our world tomorrow?

How about these:

- Hi-res video from dSLRs. Mini movies for your clients? Scouting sessions? Someone's doing it in your area today.
- Streaming video from the cell phone. A new product for your customers? Are you ready to deliver slide shows and movies in that format?
- Social networking images. Are you scared they will rip them off and post crappy scans? Give it to them instead, with branding and links to your page. Insist on friending.
- iPhone apps, and more like it.
- Augmented reality - point a phone at something and it shows you stuff about it.
- Cloud computing - no longer do you need a thick client (computer). Upload and allow your customers immediate access to images? A custom-branded photo edit and download site with your name?
- eBook readers - how can you leverage them for your photography? PDF books of your customers' images? Coffee table eBooks? Fund-raising calendar/books?
- Batteries that last forever and cards with immense storage - marathon/excessive shooting sessions?

The key takeaways are these:
- Resistance is Futile. The Borg (TM) were right.
- You survive by not only adapting but taking the new tech and making it a buisiness edge. Think iTunes, Flickr, mPix. How can you develop an edge with technology?
- Find out how to stay in your industry, but blow out one wall of your "building" and expand the concept to expand or redirect your business' direction instead of fighting the technology.

Me? I can't wait until the 550 Megapixel ocular implant with wireless gigabit download and heads-up realtime editing is available. Plug me in, baby!

Thursday, November 5, 2009

Tips from the Waiter

I get the New York Times news digests several times each day. This one highlighted 100 tips that this restaurant owner proposed for his new property soon to open:

http://boss.blogs.nytimes.com/2009/10/29/one-hundred-things-restaurant-staffers-should-never-do-part-one/?em
http://boss.blogs.nytimes.com/2009/11/05/one-hundred-things-restaurant-staffers-should-never-do-part-2/

It's painted as list of things his staff members should never do. But you can look at each point and turn it into a "thing to do" if you wanted to be positive. If you have ever worked food service, you'll quickly remember some of your serving days and some of these will ring true...unless you worked in a biker bar or dive.

The common themes come out of the 100 deliverables:
- Treat each customer the same
- Allow them the time, dignity and space to enjoy their meal
- Don't smother them or stroke them
- Make the environment perfect for their dining experience

You can adapt these to any business. The 100 rules would obviously not apply to your studio or home-based business in every case, but you could take your themes and derive your 100 rules if you wished.

In my case I may choose these themes:
- My customer needs to feel very comfortable with me as their photographer
- My customer should feel that I have unique things to offer that others don't
- My customer should not worry that I don't have a studio
- My customer needs to know that I'll be around for a long time
- My customer should have a clear understanding of what I offer

Let's take the first one and derive some do/dont's for my operating policy:
- My customer needs to feel very comfortable with me as their photographer

Here might be my policy steps to achieve this objective:

1. Answer the phone professionally and with a friendly tone
2. Get their name and use it as you discuss their needs...take notes if needed
3. Create a connection - community, etc.
4. Understand how they found you and use it to create a bridge
5. If they visit my residence, it should be comfortable and clean
6. My email, telephone and written etiquette should be correct but not stuffy
7. I should not over or under dress for the type of meeting/session
8. I should maintain good eye contact and tone of voice
9. I should not bring my other troubles into their world...focus only on them.

You can see that with a small handful of objectives, you can derive a great list of specific behaviors or actions that will be supportive to your organization's customer focus. Large or small businesses may have different objectives. Certainly different business types will have different objectives. If you hire or have employees, this list should be used in training and evaluation. If it's just you, then you should review this to make sure you can step out of the "photographer/technician" role and be the customer service professional that you need to be in order to run a small business. If you cant...then hire or prepare to be disappointed!

Thinking about your business from a new customer's viewpoint will help you to tailor your customer contact guidelines. Imagine a new mom with a newborn, a nervous young man just engaged, a senior or her mom cold calling from a google search, or a business trying to engage you for commercial work. How is your first call contact likely to be perceived by them? How often do you return calls? Do you keep good call records? Are you pleasant on the phone? Is your web contact/support information useful? Do you cater to the lunchtime web shopper - with price lists and other supporting information? Do you have the right images, testimonials and reviews to make your potential customers feel good about you? When and how do you meet with them? Are they happy or awkward/nervous when they leave the meeting?

I know the 100 do/don't list caused me to think about my customer service practices. Being a sole proprietor makes me waiter, cook and house manager. I need to make sure their interaction with me makes them feel good, comfortable and positive. It may not win the deal, but bad customer service will often lose it for you!

Sunday, November 1, 2009

Don't tell me it's a "Down Economy!"

I regret not posting a lot on this blog over the busy summer. I had a ton of senior and wedding business, and it's just now slowing down to the point where I can reflect and post on it.

It's been a busy year for our part-time photography business. We exceeded our business goals for weddings and seniors, and have almost exceeded the 2009 business plan, and it's only November 1st. We have a strong backlog for next year already.The business has remained debt-free, we upgraded out equipment and have a good war chest for the winter and next year.

We have remained active in many of the charitable organizations that we support, and have donated several sessions for charity auctions.

And in the middle of all that, I had a heart attack.

So I'm slowing down a bit, and watching my physical exertion, as well as changing my diet. But I'm not backing off of the business. I'm blogging about my cardiac recovery at my Round 2 blog.

Our company is not feeling the "Down Economy." We have lots of inquiries and considerable bookings from them. Yes, some people are shopping based on price, but I don't mind losing some of my consults to someone who is cheaper. The customer will get exactly what they pay for. I'll be raising my prices this winter, and I'm confident we'll be getting more business, both from word-of-mouth, and from our web presence, which attracts now more than 50% of our calls.

I know we're not too expensive. we have many customers ordering the high-end packages, and we get very few comments about the pricing being too high. In fact, some of our customers and potentials tell me that we're quite affordable.

Don't let the media fool you into thinking you can't make money in this economy. I know we could easily double or triple our revenue if we were full time. There are market segments that we could tap into tomorrow that would greatly raise our business level. We are not pursuing them now because, as a part time business, I need to manage my workload to stay sane (and healthy).

If you are a new or potential photographer, get out there and generate awareness and business. It's not hard - but you will have to put the camera down and work on business and marketing plans and other "not so fun" stuff. But it's worth it. If you can run a business that goes head to head with the "big studios", and you can offer more value and more creative solutions then they offer, you will win some customers...probably enough for you to grow at a pace that is debt-free and comfortable for you.
And get a checkup!

Sunday, August 16, 2009

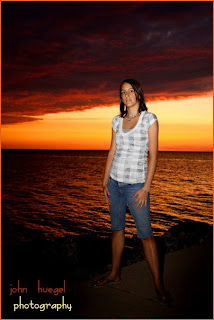
The Perfect Sunset Portrait


I apologize for my lack of posting recently. I have been doing a lot of senior portrait work, including a lot of sunset/beach stuff. I spend a lot of time shooting and editing. My session and shooting methods are definitely not set up for high volume! But I do really enjoy these long sessions with seniors, hitting many locations and lighting situations. And in this journey, I continue my quest for the perfect sunset portrait.

If you recall the last post, I was trying to come up with the right formula for shooting in a sunset situation. I have shifted all of my daytime shooting to manual mode with exposure metering and manual color balance, but once I get within 15 minutes of sunset, the world changes too quickly for me to track with manual exposure. When dusk approaches, I must change my approach.


So when sunset is imminent, I switch to Aperture Priority with a -1.5 to -2 Exposure Compensation. That sets the higher saturation and darker exposure for the background sunset. Then I dial in the flash.
In the past I use my 430 EX with Gary Fong Lightsphere (too dark) or bare bulb (too hot). It was a Goldilocks moment. I needed something in the middle - good light dispersion without sharp edges or too much attenuation.

I picked up the Lumiquest Sotbox III last week ($39). It attaches to my camera mounted flash, and provides an 8x9" rectangular surface in front of the flash. In fact, it velcro attaches to my flash using the same velcro I use to attach gels for specialty colors.
This image shows the clear close illumination I get from the Lumiquest for beach work. The flash is really working, as the camera EC is -2 and the flash compensation is between +1 and +3 depending on my distance to the subject. In landscape orientations, I still need to tilt the flash up a bit to keep from overlighting the sand at the girls' feet. But other than that, I can get good even coverage of the subject.

I do have my flash cable so I can move the light off of the camera plane for additional impact. Perhaps I'll try that on my next beach shoot.
So for those of you keeping score, here's my cheat sheet for sunset portraiture:

  • Aperture Priority
  • -1.5 to -2 Exposure Compensation of the background, to get good saturation
  • Shutter speed 1/250 or less (1/250 for movement; slower for posed shots)
  • Lowest ISO to make all this happen
  • Lumiquest softbox on my Canon 430EX flash
  • Typically f/5.6 to f/11
  • Flash Compensation around +1 to +2
  • Tweak the flash position about 10-15 degrees above horizontal to keep the sand from blowing out

If this stuff still confuses you, get and read "The Hot Shoe Diaries" by Joe McNally. It is totally worth the money and time to buy and read. I don't start a shoot without mounting my external flash on my camera. I don't use it on every shot, but now it's an option for me every time I start to frame an image.

Shooting subjects at the beach during sunsets is a very challenging but rewarding situation. If you get it right, you will make the subject and their families very happy!

Thursday, July 23, 2009

Technique: The Sunset Portrait

I have been shooting seniors outdoors for 5 years now. Being on the shore of Lake Erie, I often am at the beach at sunset, shooting a portrait of the senior against a the setting sun and the lake. I'm getting pretty good at metering for natural light and color balancing for available light. But I still get a bit flummoxed at sunset. The light changes quickly and I need to be able to properly illuminate my subject in balance with the background.

I've written about sunsets in the past, but I wanted to hit it again while the summer season is fresh. My technique revolves around exposing for a deeply saturated sunset, then providing adequate fill lighting for my subject. I'll set the ISO for 100 to drive a lower shutter speed, then take a sample shot of just the sky under Aperture priority and tweak the shutter speed to get under 1/250 second - the max sync speed of my attached flash.

Then I review for exposure. Generally I'll underexpose the default sunset parameters by 1-2 stops. Say at ISO100 my exposure was 1/200 sec at f/4 under Aperture priority. Then I'll switch to Manual and set 1/200 and f/5.6 to f/8. That will darken the skies and saturate the colors.

Here's where it gets tricky. Sometimes the sky is too bright even at ISO100 to give me a decent f-stop at 1/250. I often have trouble balancing the flash with the ambient light. So I tried a neutral density filter on the lens. That lets me set a lower f-stop / shutter speed combination.


In this shot I had a Tiffen .9 Neutral Density filter on the lens. This gave me a lot of control over the shutter and f-stop combos in my flash speed range. Through trial and error, I set a flash compensation to give the right fill and shot away.

At this point, the ND filter and camera settings give me great background exposures. I still have to tweak the flash settings a bit to get the right fill so the subject isn't washed out or underexposed. That's my next area of improvement.

Overall I'm pretty happy with the set of exposures using the ND filter. I'll want to put some diffusion on my bare flash next time, to soften the shadows, but other than that I am happy.

If anyone has tips to get good foreground/background balance for this kind of image, please let me know!

Sunday, July 12, 2009

Technique: Avoiding "Flat" Images and Prints

I have been in many offices and homes of co-workers, customers, friends and clients. I will often check out the family prints they have on display and will critique them for composition, lighting, editing and finishing. One thing that amazes me is the number of technically good photographs that look absolutely dull in the frame. The composition is fine, the lighting OK, but it's clear that the photographer didn't take much time editing and printing the images. The contrast is low, the exposure levels are not pleasing, and the color saturation is flat or the color temperature is wrong. And these are images that have come from "professional" studios.

It just looks to me like the photographer stopped working once the shutter was pressed.


Image Editing Workflow

I believe that you need to touch each image to make it the best it can be. I have developed a workflow for editing images that I find to be efficient and provides good results. Here are the general steps I look at when editing a batch of photos. I apply this to virtually every image before my customer sees it, whether online or in proof/book form.

  1. Is the exposure correct? (correct over or underexposure)
  2. Is the color balance correct? (It is now for me, as I set custom WB before shooting!)
  3. Are the skin tones pleasing? (if the image is nice but skin tones are dull, the subject will not "pop")
  4. Is the image contrast range wide and pleasing? (are darks dark enough, and lights light enough?)
  5. Is the color saturation appropriate? (are colors dull and faded, or bright and exciting?)
  6. Is the image cropped properly? (too much dead space?)
  7. Are there any quick cosmetic or environmental edits that I should make? (zits, distracting stuff in the BG, eye bags)
I don't actually go through this litany out loud, but my eye looks for things on the image that could become better with a bit of tweaking. It's the same thing that a film/negative photographer may have done after looking at contact sheets.

Example

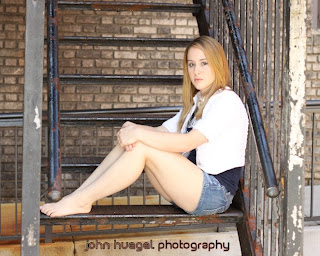
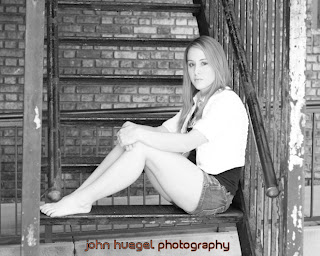
The first image of my daughter was taken during a scouting trip for outdoor locations for Seniors. This is a nice fire escape with good lines, color and texture. But to my eyes, it is flat. Part of that is because I overexposed the image a bit.

My first step was to crop the image a bit. I took the default 4x6 layout and applied an 8x10 crop rectangle. This shortened the sides and increased the emphasis on the subject. This first image is after cropping, but with no other edits performed.

IMAGE 1
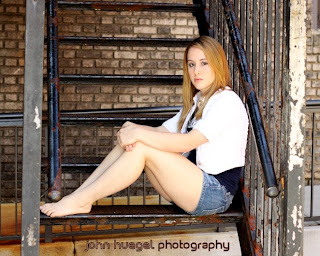
Next, I punched the contrast with the "Levels" tool, available in most any decent image editor. For me, I tend to pull the black point in past the tail of the black curve, then tweak the midpoint to bring the best exposure level to the skin tones. If I'm very underexposed, I may also bring in the white point. So here's image number two.

IMAGE 2

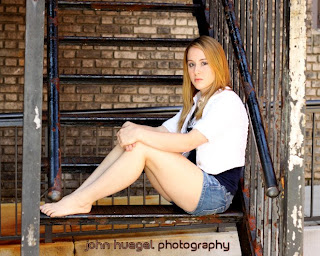
Next, I brought the saturation up a bit. This you can overdo, so I watch for the point at which either skin tones or background elements look artificially colorful. Then I back off a bit. For most outdoor stuff, I'm applying maybe 8-15% saturation. In this image, the difference is very subtle. Look at the hair color and rust tones in the background.

So before any special effects, here is the touched up image. With the hot keys I have in my editor (Paint Shop Pro X2), I can do this in about 30 seconds for each image, including the tweaking of settings between images.

IMAGE 3

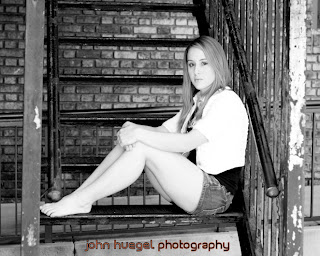
For black and white, the same is true. Here's the same cropped image converted to BW using Channel Mixer (red: 60%, green: 24% and blue: 16%). I prefer this mix because it tends to bring out skin tones. But you can see it's still "flat".

IMAGE 4

So I go back to the Levels took and bring in the black point and nudge the midpoint. Now I like the overall balance better.

IMAGE 5

Conclusion

Amateurs don't often have the patience or skill to do these edits. The expect each shot out of their camera to be "good to go" and may be OK accepting drug store prints.

When you sell prints to someone, they are in your hands for just a couple minutes, until you package and deliver them. But they are on display in someone's home or office for years. You can't let a boring, flat print represent you for the next 2 decades.

You want your images to be exceptional, so that they will stand out from their amateur prints and those of other photographers who don't care enough to edit and print with care. You want the "wow" factor of your images to cause people to talk about the image and you. Spend the time with your images after you take them. Weed them down to the vital few, edit with care and taste, and make each image the best it can be. The impact on the customer will be significant, and your reputation as a true photographic artist will spread. Your killer prints will justify higher prices, and the word of mouth marketing will increase your business!

Thursday, July 2, 2009

Tools: Backdrops (for sale!)

Many photographers will at one time or another work indoors with backdrops and studio lighting. Over the years, photographers will build quite a collection of various backdrop materials, be it seamless paper or dyed or painted muslin or canvas.

My first backdrop was some white muslin I bought at Wal-Mart in the sewing section. My second backdrop was a grey backdrop I dyed myself from the same white Muslin. I quickly realized my talents did not lie in the backdrop production area, so I started buying them.

My favorite working backdrops came from Sky High Backgrounds (800-351-2158). They are heavy duty and very color saturated. I schlepped three of their backdrops home from the PPA show in San Antonio during the 2007 "Ice Storm" convention. I recently learned about Backgrounds by Cole (800-926-2653) here in Western PA and I have a flyer of theirs on my bulletin board. They may get my next order. I also use the heavy duty 10x20 white vinyl backdrop from Denny Manufacturing
(800-844-5616) for much of my high key work, and their flat black for black background work. The black is also good to hang behind another backdrop if there is a bright light source behind the backdrop stand, such as a window.

I tend to prefer dyed muslin, as the colors are vibrant and the backdrops easy to move and set up. They do need some occasional steaming and cleaning, but they are portable to some degree. I take a couple of boxes of backdrops on location when I do my senior photography. The student picks a couple of colors and we hang the backdrops while they change clothing. We have done black, white/high key, red, blue, beige, camo and many more. I'm probably up to 10 backdrops in my "kit" by now.

Which leads me to this post. I have two 10'x20' painted muslin backdrops that I no longer use. One features shades of grey, called "Pearl and Grey", and the other shades of light blue and green, named "Mint and Blue". Think of the second one as a great set for "Little Mermaid", though many other colors will go well with it. I purchased these in 2007 from Owen's Originals (800-767-3122) for around $100 each. I'm selling them for $60 each plus shipping, or both for $100 plus shipping. They are in great shape, needing only to be steamed before use. First person to contact me gets them.

The photo of them folded up is actually a bit more abstract than functional, but I didn't have the space and time to unfurl them and give them proper illumination.

Contact me at 814-881-2840 or email johnhuegel@jhphotomusic.com if you are interested.

Wednesday, July 1, 2009

Tools: Fast Prime Lenses

Today I received my new Canon EF 50mm f/1.8 II lens. I became intrigued after reading about it on the Canon Digital Camera Forum (http://photography-on-the.net).

This inexpensive prime lens has a very wide aperture. I want to be able to use it in two situations: low light and places where I want to create a very narrow depth of focus.


You can see in the first shot that the depth of focus is very narrow. I'm shooting at ISO1600 just so the shutter is fast and camera shake doesn't enter into the equation.

Here's a series of two images taken with varying f-stop. The first was shot at f/1.8, the lower one at f/8. You can see the degree of control you have over depth of focus.
The last shot is of my trusty mutt Emma. Nice sharp focus on the eye. You can even see the overhead florescent tube reflected there. And the areas to the front and rear of the eye are rendered out of focus.

This is going to be a nice, inexpensive addition to the camera bag. I paid under $100 for this lens and I know it's going to give me some additional capabilities for tight depth of focus, and low light shooting, in places like churches, reception halls and auditoriums.

I'll try to get some test shots of people in the next couple of days using this lens and post a follow-up. It does feel weird zooming with my feet...I keep grabbing for the zoom ring on this prime lens and feeling stupid when it's not there!

Tuesday, June 16, 2009

Learning: Free RANGEFINDER Magazine!

I received my Rangefinder magazine subscription renewal today. I have received it for several years, and I dive into it as soon as it arrives. This magazine is a good publication for professional photographers. You get to see the work of lots of photographers, read articles about technique, see reviews of new products, and view ads for potential product and service providers.

Published monthly, it usually runs about 140-150 pages. This month's issue (June 09) features articles on the state of the industry, conversations with the pros, an interview with a first year photographer, and more.

If you are an aspiring or new professional, you should get the free subscription here. It beats just about any of the amateur photography magazines out there. It will take you 2 minutes to subscribe, and then you will have access to a great resource for no cost!

Sunday, June 14, 2009

Technique: Indoor Dance Recital Images


This weekend found me in the sound booth at my daughter's dance recital. I was assigned to music and another person had lights. We had spent the prior two days perfecting the lights, cues, sound, stage and props. We were through our first evening show and the jitters and lumps had been worked out.

So for night two, I felt we had enough spare resources between Jamie the lighting person and me to squeeze off some stills of the recital.

The challenge for dance is tough. The dancers are moving, requiring a moderate (1/60-1/200 sec) fast shutter to prevent motion blur. The light source is continually changing, meaning that a fixed exposure will probably not create consistent exposures. The low levels of light confound a lense's auto focus, and the photographer is often quite a distance from the stage. This is a common challenge for indoor performance photography. The objective is to stop the motion and get as much detail as possible. So here was my setup:

  • Canon 50D
  • Medium JPG setting (8MP images)
  • ISO 3200
  • Tamron 17-50 f/2.8 Lens, set to capture the whole stage
  • Manual focus (used live view to sharp focus near the front of stage before show started)
  • Tripod mount
  • Manual White Balance (taken from Tungsten reference)
  • Shutter priority - 1/100 sec (most of the exposures were f/2.8 to 3.5)
  • Remote trigger on 10 foot cord
We taped the trigger button to the light board between us and marked it with tape so we could see to hit it in the near darkness of the light booth. When Jamie was working heavy lights, I would look for the good shots and punch the button. When I was cueing music for the next number or talking backstage over the headsets, she would take over.

We took over 1000 images of nearly 40 numbers over the four-hour show. Each one was well exposed, and showed only the smallest signs of motion blur at the dancer's fastest-moving body parts. With fixed manual focus, the shutter lag was low, so we could capture many leaps in mid-air. And, an advantage with the fixed position of the tripod was that I could crop and resize all 1000 images in a batch using a saved script. That saved me literally hours of editing.

The images are far from technically perfect, but they are very good considering the shooting environment. They are not as crisp as if we could have shot at a lower ISO, but we captured the true spirit of the performance and created some wonderful memories and images that can be used to show the variety and versatility of the dancers, choreographers, and lighting team.

For me, this wasn't a commercial gig. It was for my daughter and the larger dance family to which we have belonged for years. But if it was for money, I would not have changed much in terms of the camera setup...maybe shoot at a higher resolution and vary the zoom level. If I had a faster lens, I could have dropped the ISO a level or two. This is one case where Image Stabilized lenses would not have helped...I needed every bit of speed from the f/2.8 lens, and being on a tripod with remote cable release removed any vibration problems.

So, next time you are challenged with a dark room and can't use supplemental lighting, break out the tripod and fast lenses, set your shutter speed and high ISO and fire away!


Saturday, June 13, 2009

Professional Networking

Every photographer needs to continually grow - socially, professionally and technically. One good way to grow your skills, techniques and business savvy is to network with other photographers.

I belong to three professional photographer groups:

Professional Photographers of America (PPA) - very good professional communications, studio management and outstanding annual convention. They also handle professional photographer certification. They offer a two year "aspiring" membership at half price. Their monthly magazine is top notch.

Society of Sport and Event Photographers (SEP) - Geared toward people who shoot events - sports, school, church, etc. It's affiliated with PPA.

Digital Wedding Forum - An online forum dedicated primarily to wedding photographers, but also branching out into portrait and other areas. It has many forum discussion areas, and now has a new blog, which is excellent. I believe you can follow the blog without being a member. They also have a "student" membership which is no cost, but only allows access to some of the resources.

I also belong to the local chamber of commerce, for local business networking.

Each of these provides learning and networking opportunities which allow me to grow technically, professionally and as a businessman.

So where should you start? I recommend Digital Wedding Forum "student" member first. Lurk and participate with other beginners, and then decide if you want to take the $100/yr plunge to become a full member.

Then check out PPA as an aspiring member. That will let you go to the PPA convention, which in 2010 will be in Nashville!

Don't just sit there...network!

Monday, June 8, 2009

Book Review: The Hot Shoe Diaries

I just finished a great book on photography and lighting. The Hot Shoe Diaries: Big Light from Small Flashes, (ISBN 978-0-321-58014-6, $39.99 list, $26.39 at Amazon), by Joe McNally, is both an entertaining and educational read.

His approach to photography involves the use of portable strobes. Although he uses the Nikon camera and lighting system, the principles apply to any location photography. I easily adapted his ideas to my Canon system.

His writing style is very informal and fun to read. His understanding of the technical aspects of camera lighting is strong, and his imagery is stunning. It is amazing to wander through the book and understand that certain photos were made with just one or two portable flashes.

He spends a lot of time talking about color temperature and how to gel your portable flashes to create a light color that works in your image setting. He also describes how to use light modifiers like shoot through screens and umbrellas to soften the light.

I was inspired from his writing, and at a recent wedding indoors under tungsten light, I used his techniques for some indoor lighting. I gelled my flash, applied my favorite softener (the Gary Fong Lightsphere), and ended up with good soft camera light that was compatible with the decor. Good thing, because I was shooting f/2.8 at ISO3200! I was very happy with the resulting images.

Joe also addresses some of the fundamentals of good photographic technique, such as camera grip and center of balance. The book, 300 pages long, was filled with great images, diagrams on how they were made, and colorful narratives on how the image/session was conducted.

In summary, this book was very informative and useful. I read five to ten photography books a year, and this one was the best I've read in a very long time. I highly recommend it to anyone who shoots digital photography, whether you think you are a portable flash user or not.

Monday, May 18, 2009

Technique: Controlling Black and White

Black and white imagery is powerful. You can completely change the mood of an image once you convert it to BW. Many beginning photographers don't understand that there are several ways to convert an image from color to BW. The method you choose will determine the appearance of your image.

Let's start with this image. Shot in color, it has good exposure characteristics.

The easiest way to convert to BW is to desaturate the image. The two ways to do this in a photo editor are to convert to Greyscale or to edit the Saturation to zero. This image shown here is an example of the color image above converted to greyscale or desaturated. The key difference between these is that the greyscale changes the color space to Grey, and the desaturation method keeps the color space, but removes the saturation. Many print labs want you to keep your BW images in the RGB color space, so desaturation is the preferred method in this example.


But in both cases, you don't have control over the grey tones. Often with this conversion, the skin tones will take a darker grey than you would like. In the example above, I am not happy with the dull grayness of our model's skin.

The secret to good BW conversion is control over the colors which receive more lightness in the mixed down image. And the key to that is the "Channel Mixer".

The channel mixer allows you to create a monochrome image in a color space and control the blend of red, green and blue. The default value would be 33% of each, resulting in pretty much the same mix as a desaturation. But if you change the blend to favor red, you can boost the skin tones without blowing out the image, as caucasian skin has more red color in it than blue or green.

In this image, I used 55% red, and about 22% of green and blue each. The total signal information is the same (100%), but the skin tones are noticeably brighter than the desaturated image above.

I encourage you to experiment with a favorite image. On one copy, use the desaturation method (go to the hue/sat/lightness control and pull the saturation down to the bottom), then create a duplicate image and play with Channel Mixer. Vary the blends of red/green/blue and see how the resulting images display.

But Channel Mixer gives you some more creative control. If you go beyond 100% of the "mix", you can create some interesting effects, such as blown out highlights.

You can also overdrive the signal levels and compensate with the "Constant" parameter and basically increase the black/white contrast levels. Here I chose red at 90% and blue and green at 20%, which normally would blow out the image at 130%. But then I lowered the Constant to -30% and it maintained the skin tones while creating more contrast with the dark tones. Notice how the model's eyes and sweater are now dark grey.


So, the next time you are working on an image and want to create some drama, go for the Channel Mixer tool. It will help you create strong black and white images, and give you the edge that your clients' drug store kiosk can't reproduce!

Wednesday, May 13, 2009

Business: Your First Wedding

One of the most nervous moments a photographer has is arriving on site at their first wedding. Maybe it was a family/friend request, or someone who found you through a friend or another customer. But it's your first one! What do you do? Have you prepared for this day? Let's talk about how you can be best prepared, and deal with that first magical wedding gig.

Equipment
  • Clean your lenses and pack your camera bag methodically before you leave your house.
  • Know how to change your camera modes quickly and efficiently, in the dark.
  • Have your spares close to you. Camera, batteries, lenses, whatever you have.
  • Format your memory cards before you leave for the site. Nothing is more frustrating than shooting the first 30 shots and then realizing your card has tons of images from the last shoot.
  • Consider getting an image tank device that will duplicate your cards to hard disc on location. Good insurance policy for around $100.
  • Batteries. Lots of Batteries. If you power flashes with AA, get Lithium batteries. Take your chargers in the car so you can power up at the reception.
Technique
  • Drill into your head "check your barrel" - meaning don't shoot without confirming ISO, shutter, f-stop, mode, lens auto/focus, white balance, image size/quality settings.
  • Know how to set white balance on your camera. Do it whenever setting or lighting changes. It will save you HOURS of time editing.
  • It's digital...shoot more than you think. Look for environmental shots and crowd/response shots. You'll love those background shots for album layouts.
  • Shoot 3 shots of every image, plus extras proportional to crowd size. For large formals, stay in one position and fire off 8-10 images. You'll have the right recipe to do head swaps for blinkers.
  • One technique - tell everyone to close eyes and when you count three, they open and smile. Usually the first shot has no blinkers!
Flow
  • Do a walkthrough of the church or ceremony area. Understand lighting issues for the time of day.
  • Meet the people in control and remember their names. Church secretary, catering manager, DJ, etc.
  • Ask if there is a rehearsal at the church, and if you can show up. You can also shoot some shots of the people in rehearsal and include as before/after. You will also be treated more like "family" by the bridal party after the rehearsal.
  • Talk to the officiating person at the ceremony, to know where you can and cannot be, and if there are times when it is inappropriate to shoot. Ask about flash; assume "no flash".
  • Make a list of the key shots you want to get. Keep a pencil with you.
  • Note the name of the principals, and use them. Bride, Groom, parents, wedding party.
  • ID your "go to" person to help find others and resolve problems. Often this person is the matron of honor, but sometimes its a friend who is not in the bridal party.
Personal
  • Dress comfortably but not too casual.
  • Depending on location and dress, it may be OK for men to not wear ties. Maybe a dark jacket and dark clothing. Slacks and comfortable shoes are good for both men and women.
  • Don't let personal body adornments (tattoos, piercings) degrade your image.
  • You will sweat. Lots of deodorant!
  • Throw a bottle of water and a couple energy bars or granola bars in your bag. You don't want dehydration or low blood sugar to impact your shooting.
  • Go potty once you get there...to lower the risk of "timing problems!"
  • Turn off the cell phone. Do Not Text On The Job!
Business
  • Have business cards, and only give them out when asked.
    Talk to bride and groom about whether you want to advertise web listing of the gallery, and print cards with their image if available.
  • People will ask you about your camera. It's the conversation starter. Be prepared to talk Megapixels.
  • Probably not a good idea ever to drink at the reception. You can have a beer when you are uploading images at home.
Emotional
  • You may be more nervous for your first couple of weddings than the bride or groom!
  • Know how to relax yourself (focus, breathing, positive thoughts). Know how to recognize when you are agitated.
  • Try to get some sleep the night before!
  • You are expected to be in control. If your timeline is drifting or Uncle Bob is shooting over your shoulder, don't hesitate to be polite but firm. Think ahead of time the words you will use.
  • Remember that you will be wired...adrenaline high. You may be a bit edgy so make sure you know how to turn on the "nice" and turn off the "snap".
In The End, Remember:
  • You will shoot better photos than anyone else in the room.
  • You have permission to tell pretty much anyone to do anything...implicit permission from bride and groom.
  • You will have hours after the event to decompress and think about what could have gone better. Don't worry about it until you leave the event.
  • Be confident...they hired you because you are "you"!

Sunday, May 3, 2009

More Flowers


I'm still working on my technique with the light meter and custom white balance. This image only received a touch of sharpening and contrast enhancement.

I shoot exclusively with Tamron f/2.8 lenses. I really like the narrow depth of focus that I receive with these lenses.

This one was at ISO800, 1/1600 f/3.5. Nice focus. Nice color. Nice white balance. I like it!

Can you tell I have spring fever?

Sunday, April 26, 2009

Technique: Meter and Manual Mode

I'm fired up after my Super Monday seminar. I learned about exposure calculation and white balance. Just two days after the seminar, my new Sekonic L-358 meter arrived and I spent some time getting to know it. I also ordered a Photovision 14" Calibration Target. Together, these two items will let you take images that are both well exposed and perfectly color balanced.

This image is a great illustration. I metered the flowers at ISO400 and got f/11 at 1/500 second. I wanted that high speed because it was a little breezy out and I was shooting with a 200mm lens. The f/11 was my desired f-stop: enough to render all three of the flowers in focus, but throw out the background.


The steps are simple:
  1. Meter the scene and choose the exposure parameters that give you a good exposure.
  2. Put your calibration target in the scene and shoot an image. It has a black, grey and white band.
  3. Review your exposure histogram on the camera and verify you have a spike at left end, middle and right end.
  4. Use that image to set a custom white balance. It's about 2 keystrokes on the Canon 50D.
That's it! You get solid exposures without a lot of fiddling, and great white balance. This image was untouched except for titling and resizing for the web.

Bottom line: Don't be afraid of the meter. It took me years to get it and get comfortable with it. Use it early in your career and you will start to understand the exposure triangle much sooner, and you will get killer images out of the camera!

Wednesday, April 22, 2009

Earth Day Special: Being a Green Photographer


Happy Earth Day!

If you want to run a profitable photography business and still want to be nice to the earth, you will have to think and act green. In general, that means you will want to look at ways of reducing your consumption (energy, materials), and your emissions (CO2, waste, hazardous materials).

Let's kick around some ideas on how to reduce consumption and emissions. You'll find out that most of these ideas will also save you money, and increase your bottom line!

Electricity
Change out incandescent bulbs with compact flourescent. Last year I changed 90% of the bulbs in my house and yes, my electricity dropped. Cost: $50-100, payback <1yr.>

Heating
Put your house and/or studio on a setback thermometer, which has both time of day and day of week settings. There is no sense in heating or cooling when no one is there. Cost: $50-150, payback around a year. Keep the filters and ducts clean and unobstructed. Make sure your buildings are properly shaded and sealed against air and heat loss.

Gasoline
Switch to that tiny car. Advertise your green-ness by driving a hybrid or high MPG vehicle. We have two hybrids, which I promote in my business marketing. I will be honest that you probably won't get a payback on a standard model vs hybrid, but if you're trading in a Hummer or Conversion Van at 10MPG for a Civic (my story), the main gain is the small car...the Hybrid option is more of a statement than a real financial gain. Also - you can save a lot of fuel with basic driving behavior changes: combine trips, keep those tires inflated, and drive like you have no brakes - limit heavy acceleration and braking, and look 1/2 mile ahead to decide if you need to accelerate. Since I don't have a studio, I advertise that my studio (Civic Hybrid) gets 45MPG!

Paper
Don't print and use lots of paper for your internal workflows. Use spreadsheets and online to-do lists. Sign up to have junk mail reduced or eliminated. Switch from direct mail to online marketing - Facebook, etc. Reduce your "dunnage" related to photo delivery. Drop ship orders to your customers to avoid double-handling. For the waste from your incominb print lab shipments, find someone in your area who can use the bubble wrap and other packing in their outbound shipping business. Recycle paper (shred the personal stuff), magazines and cardboard, regardless of whether your municipality requires it. Replace your seamless paper with muslin or durable vinyl.

Chemicals
Recycle your disposable batteries. Use Lithium instead of alkalines. Use rechargables when you can. Minimize proof printing to keep your labs' chemical use low. Do more online and on DVD. Recycle the inkjet cartridges and used computer equipment.

Water
Collect "grey" rainwater for your landscaping. Don't offer bottled water in your studio. Follow basic water conservation - low-flow shower heads, low-capacity toilets. Turn it off when you shave/brush.

Solid Waste
Compost. Recycle the cans and bottles and all plastic stuff. Separate and recycle all of the applicable trash.

Marketing Ideas

Here are some ideas to leverage your "green-ness" in promoting your business:
  • Blog about the top 10 reasons why you are green. Here's my post from last year.
  • Offer a "GREEN" senior session. All natural light, all outdoors destinations, all e-proofing, no paper at all (except for the final prints). Bundle a tree seedling or other nice eco-gift or give-back.
  • Offer a reusable shopping bag with your studio logo instead of paper delivery bags.
  • Sponsor a volunteer activity such as adopt-a-highway or waterway cleanup.
  • Volunteer your time and services to help an environmentally-oriented nonprofit.

Stay Green!

Monday, April 20, 2009

Education: PPA Super Monday

Today I took a day to attend one of Professional Photographers of America (PPA)'s Super Monday seminars. These sessions, produced yearly by studio owners, are a great way to learn new techniques and approaches.

I attended the course entitled "Where Is the Light?", taught by Dana Nordlund, CPP. Dana, a Certified Professional Photographer with over 20 years under his belt, put on a great session oriented around understanding and using light. Using a light meter and custom white balance, we had many hands-on sessions in both natural and studio lighting. Dana's excellent work can be found on his website: http://www.dananordlund.com.

Bruce Hahn from Hahn Photographic in Rochester was on hand as well to offer technical information on the various equipment that is used in photography. His input to me on soft boxes and light meters was much appreciated.

I urge all new photographers to become active in local and national photography associations. PPA in particular offers an aspiring photographer rate for two years, which will put you in contact with many great photographers and other industry sources of products, services and information. Many areas of the country also offer PPA-affiliated local chapters, which give you opportunities to network with local area photographers.

Thanks Dana for a great, inspiring day. I'm off to make up a practice plan!

Monday, April 13, 2009

Group Events: Presell or not?


I have worked group events for several years now. I haven't tackled the 1000 pose super-events such as soccer tournaments...yet! Usually the events number between 15 and 100 families or groups, shot on one or two days. I have taken events at races, middle school graduations, church program book events, public broadcasting fund-raisers, retirement homes and dance studios. I always try to get model releases so I can use the images in promotion and blogging.


Selling Choices


After an exhausting day of shooting, I then have to focus on selling. Over the years, I have struggled with the right approach for ordering and offering products to customers. I have used three general ways to approach sales to groups:

  1. Post the images online and let them order using a website
  2. Make them pre-determine their order and pay the day of the shoot
  3. Offer them the opportunity to review proofs and order after the event
Web Presentation

For events where I will not see the subjects again, the first two choices work well. Actually, I have found that posting on a website generally yields the lowest return, as people see but are not compelled to buy. I usually do this when I am shooting spec shots, such as at running races, or when the customer has not had a chance to view the many images from a shoot and needs to view and make choices. The orders tend to come in slowly with this method. I have used a couple of professional sites in the past - Photoreflect.com and Eventpix.com. They both have their pros and cons. I have shifted to hosting my own online catalogs which has saved me lots of fees and commissions. I use Jalbum templates and a skin called Fotoplayer. There are earlier posts which describe using these tools.

Pre-ordering

Better than online posting, when I have a captive audience and I am posing each subject and speaking with them or their parents, I will try to get an order that day. Usually I'll make up a form with specific packages and collect the funds at the time of the session. I have credit card clearing services at home, and I'll run it when I get home. Or, I'll accept checks and cash. Then I'll edit, print and mail the photos. Lately I have started drop shipping orders from my lab (Richmond Camera) directly to my customers. I have yet to see how that works out...maybe in a later post I'll talk about that experience. The benefit is lower effort in packaging and reshipping, but the disadvantage is that I cannot package the images to my usual hand-delivery preferences, nor can I see the finished prints.

Proofing and Direct Sales

Overall, I have found that the best method is to offer proofing and consultation. I do this a lot with dance studio work, as I can set up "visiting hours" at the studios and work with them on editing options and package choices. I usually end up with very nice order sizes with the consultation, but it tends to break down with large groups and run into lots of editing and time consuming "sitting around".


I have found a couple of things that work for me when I do in-studio order consulting:
  • Offer the customer a la carte, small packages and a "kitchen sink" option.
  • Offer bonus items if the customer prepays a large package on the day of the shoot.
  • Demo and show the specialty products - collages, keychains and other goodies, and they will sell.

I also sell proofs at certain order levels. It drives additional revenue and recaptures the proofing cost.
I set this up so that I have captured a large sale from the customer, so I am not fearing that they will scan the images. During the review process, I don't let proofs leave the studio, unless they have purchased the kitchen sink. Then it's exclusive!

Once I receive my orders, I enter them into my sales files and print them in batches. For local delivery or drop off, I batch them all for delivery to my business address, and break them down on my own. As I edit each image, I rename them to include the customer's last name. Then I match up the order form with the prints and specialty items and put them in a nice bag.

Summary


With groups, there are appropriate times for web-based sales and prepaid ordering, particularly if you will not see your subjects again. But the best revenue potential comes when you can sit with your customers, review their proofs and sell them on your various packages and options.